

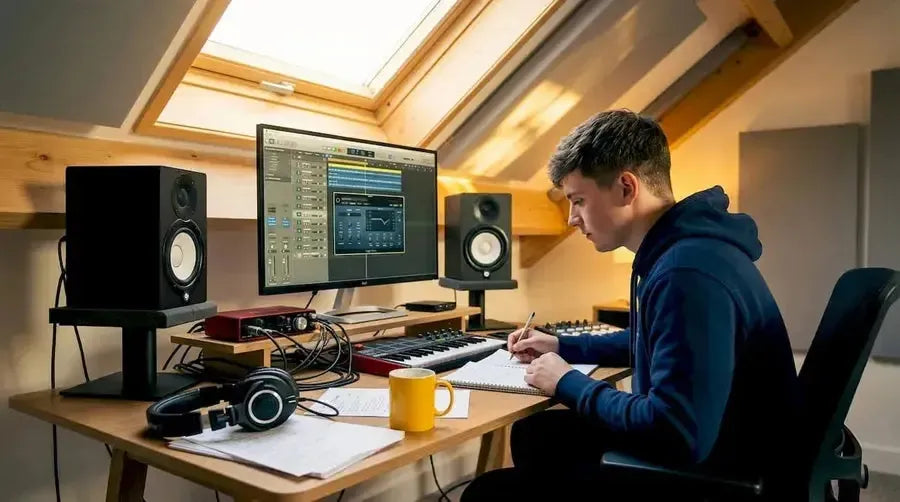
- The success of a home recording setup depends more on room acoustics than expensive gear.
- Planning your space and treating acoustics before upgrading equipment leads to clearer, more professional sound.
Spending hundreds of pounds on a large-diaphragm condenser microphone only to discover your mixes sound muddy and harsh is one of the most common disappointments in home recording. The microphone is not the problem. The room is. Setting up a productive home studio is not about buying the most expensive gear first; it is about making smart decisions in the right order, addressing acoustics before instruments, and building a signal chain that actually serves your workflow. This guide walks you through every critical decision, from choosing your room to selecting your microphone, so you invest wisely and record confidently.
Table of Contents
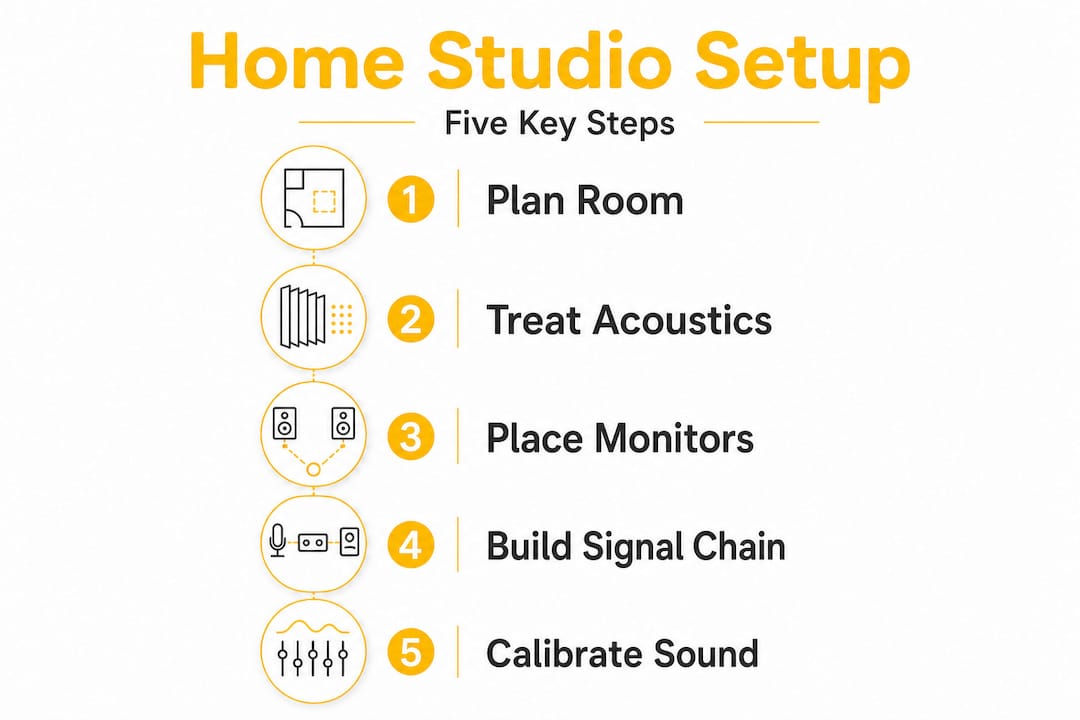
- Start with planning and your listening environment
- Treat your room first: acoustic essentials
- Proper monitor placement and geometry
- Building your studio signal chain: gear essentials and workflow
- Select the right microphone for your room and needs
- Equipment checklist and workflow for a complete 2026 setup
- Our honest take: why most home studio advice gets it backwards
- Build your home studio with expert guidance from MusicStreet
- Frequently asked questions
Key Takeaways
| Point | Details |
|---|---|
| Start with room treatment | Addressing acoustic issues delivers better sound than expensive gear from the outset. |
| Monitor placement matters | Correct monitor setup and placement can instantly improve mix accuracy in any space. |
| Choose gear for workflow | Build your studio gear around a functional workflow—microphone, interface, DAW, and accurate monitoring. |
| Match microphone to your space | Pick microphones based on room acoustics and noise sensitivity for the best recording quality. |
| Use a checklist for setup | A structured equipment list and workflow ensures a reliable and repeatable home studio build. |
Start with planning and your listening environment
The single most important habit you can build before spending a penny is planning. Many musicians rush to purchase microphones, interfaces, and monitors, only to realise later that poor room acoustics undermine every piece of kit they own. As Berklee’s recording resources confirm, prioritise your monitoring chain and room acoustics before buying microphones or expensive gear. This approach saves money and produces better results from day one.
Start by choosing the best available room. Irregular rooms with odd dimensions actually perform better acoustically than perfectly square ones, because square rooms create nasty standing waves at predictable frequencies. A bedroom with a wardrobe full of clothes, a sofa, and uneven wall surfaces will often outperform a bare, symmetrical spare room. Identify your acoustic challenges before you buy anything: listen for excessive reverb, flutter echo (a rapid metallic repetition when you clap), and low-end boom in the corners.
Think about your layout too. Where will your desk sit? Where will cables run? The position of your workstation relative to the walls has a significant impact on what you hear from your monitors. Plan for cable management from the start because a tangle of leads causes both electrical interference and genuine workflow frustration.
| Approach | Short-term result | Long-term result |
|---|---|---|
| Buy more gear first | Exciting purchases, muddy mixes | Wasted budget, poor recordings |
| Treat acoustics first | Modest setup, accurate monitoring | Better mixes, smarter upgrades |
Good planning also means reviewing the home studio essentials before committing to a shopping list. Knowing what you actually need prevents impulse buys that gather dust.
Key planning actions before you buy:
- Identify the quietest room available with the most irregular surfaces
- Measure the room dimensions and note any square or symmetrical walls
- Decide where your listening position (mix position) will sit
- Map out cable routes and power socket locations
- Research basic acoustic treatment costs before setting a gear budget
Pro Tip: Spend at least one evening in your chosen room simply listening. Play back music you know well on a portable speaker and walk around. Notice where bass builds up and where the sound feels thin. This exercise teaches you more about your room than any calculator.
Treat your room first: acoustic essentials
No piece of gear compensates for a poorly treated room. A £2,000 monitor pair in an untreated bedroom will sound worse than a £400 pair in a properly treated space. The good news is that basic acoustic treatment is affordable and achievable for any budget.
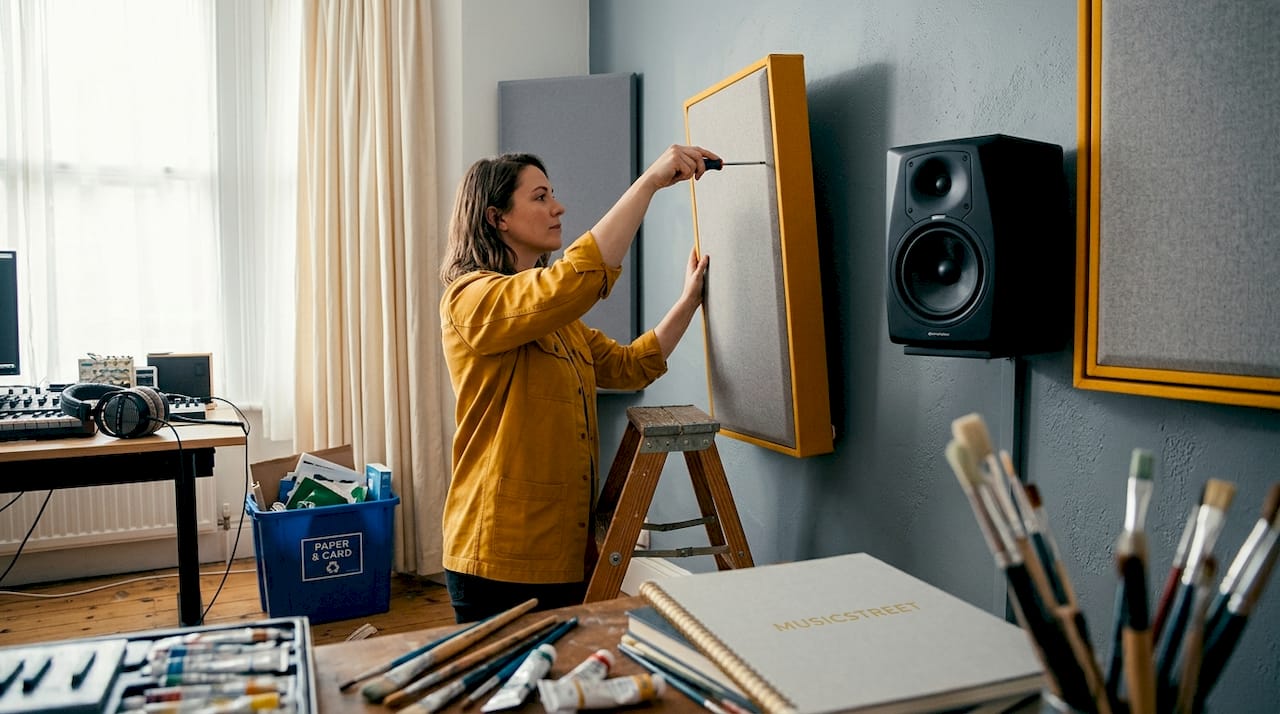
Treatment falls into two broad categories: absorption and diffusion. Absorption panels reduce reflections and tighten the sound. Diffusion scatters reflections without deadening the room completely. For most home studios, absorption should come first.
According to GIK Acoustics, you should treat first reflection points on side walls and the ceiling, and add thick bass traps in every corner from floor to ceiling. First reflection points are the spots where sound bounces directly from your monitors to your ears before the direct signal. Covering these areas with 5 to 10 centimetre thick absorption panels removes comb filtering and dramatically clarifies stereo imaging.
| Material | Effectiveness | Cost (approx.) | Best use |
|---|---|---|---|
| Rockwool/mineral wool slab | High | £1.50/m² | Bass traps, first reflections |
| Acoustic foam (50mm) | Medium | £8–£15/panel | First reflections, mid/high |
| Heavy curtains | Low–Medium | £30–£80 | Rear wall, windows |
| DIY panel (frame + fabric) | High (if built correctly) | £15–£40/panel | All reflection points |
| Bookshelves with books | Medium (diffusion) | Variable | Rear wall diffusion |
Follow these steps to treat your room effectively:
- Identify your mix position and mark the first reflection points on each side wall using a mirror (have someone slide it along the wall until you see the monitor reflected).
- Fix absorption panels at these mirror points, ideally 50mm or thicker.
- Place bass traps in all four vertical corners of the room, floor to ceiling if possible.
- Add a cloud panel (ceiling absorption) directly above the mix position.
- Consider a rear wall panel or bookshelf diffusion behind the listening position.
- Leave some reflective surfaces in the room so it does not feel completely dead.
Pro Tip: DIY bass traps using Rockwool Safe and Sound (or equivalent mineral wool) wrapped in breathable fabric cost a fraction of commercial alternatives and perform just as well. This is genuinely the highest-value upgrade you can make to any home studio.
Proper monitor placement and geometry
Once your room is treated, correct monitor placement is your next major improvement. Getting this wrong means you are listening to a combination of direct sound and room reflections rather than just your mix, which causes poor decisions when setting levels and EQ.
“Before attempting any speaker placement tweaks, set up monitors with correct orientation and geometry: ear height, angled toward the listening position, and symmetrical placement. This is foundational to improving stereo imaging and bass performance.” (Sound On Sound)
Your monitors should sit at ear height when you are seated in your mix position. Angle each speaker approximately 30 degrees toward your listening position, and position monitors symmetrically so that the distance from each speaker to your ears is identical. The ideal arrangement is an equilateral triangle: each side of the triangle (left monitor to right monitor, left monitor to your ears, right monitor to your ears) should be equal in length.
Common placement mistakes to avoid:
- Placing monitors directly in corners (massively boosts bass response)
- Resting monitors flat on a desk without stands or isolation pads (transfers vibration and distorts imaging)
- Stacking gear or equipment between the two monitors (blocks the stereo field)
- Positioning one monitor closer to a wall than the other (creates asymmetrical bass)
- Angling monitors outward instead of toward the listening position
Good monitor stand advice covers how isolation pads and proper stands reduce resonance transfer significantly. Even cheap foam isolation pads under a nearfield monitor make an audible difference in clarity. If budget is tight, a pair of foam wedge pads costs under £20 and is absolutely worth it.
Pro Tip: Use a tape measure when setting up your monitors. Even a 5 centimetre difference in the distance from each speaker to your ears will affect stereo imaging. Get it precise.
Building your studio signal chain: gear essentials and workflow
With your listening environment in order, building the actual recording chain is straightforward. A minimal setup that works well is far more valuable than an expensive one that creates confusion. As outlined in practical recording guides, the basic signal path runs: microphone or instrument, audio interface, DAW (digital audio workstation), and then monitoring through either closed-back headphones for tracking or monitors for mixing.
Understanding the difference between headphones for tracking and monitors for mixing is crucial. When recording guitar or vocals, you use headphones to hear yourself and the backing track without bleeding sound back into the microphone. For mixing, you use monitors because they reveal the stereo field and low-frequency balance far more accurately than most headphones.
Follow these steps when connecting a basic studio signal chain for the first time:
- Connect your audio interface to your computer via USB or Thunderbolt.
- Install the interface’s driver software before plugging in any microphone or instrument.
- Connect your microphone to the interface via XLR cable (or plug your guitar directly into the instrument input).
- Open your DAW and create a new audio track, routing it to the correct input on your interface.
- Put on your closed-back headphones and set the gain on the interface until the signal peaks around minus 12 to minus 6 dBFS when playing at typical volume.
- Record a short test take and play it back through your monitors to verify the signal chain is clean.
A basic signal chain for home studio recording does not need to be complicated. A two-input audio interface, a single microphone, and a free DAW like GarageBand or Reaper are enough to produce professional-quality recordings when the room is properly treated.
Pro Tip: Use closed-back headphones for all tracking sessions. Open-back headphones, while excellent for mixing, allow sound to leak out and will bleed into your microphone recording, especially at higher volumes.
Select the right microphone for your room and needs
Microphone choice is where many home studio musicians overthink and overspend. The reality is that room suitability matters more than price. Choosing the wrong type of microphone for your space is a common and costly mistake.
Condenser microphones are extremely sensitive and capture fine detail beautifully. They are ideal for treated rooms, studio vocals, and acoustic guitar recording. However, that same sensitivity means they also pick up every room reflection, fan noise, and street sound with equal enthusiasm. In an untreated room, a condenser can actually sound worse than a cheaper dynamic.
Dynamic microphones are more forgiving. They have a tighter pickup pattern, reject off-axis sound more aggressively, and are far less sensitive to background noise and room reflections. When choosing between mic types for vocal tracking, condensers capture detail but are more sensitive to room noise, while dynamics reject reflections and room noise better in untreated environments.
Research suggests that room treatment influences over 80% of perceived vocal recording quality, which means the microphone itself is a smaller variable than most people assume.
Condenser microphones: pros and cons
- Pros: High sensitivity, extended frequency response, excellent detail on acoustic instruments and studio vocals
- Cons: Pick up room noise, require phantom power (48V), more fragile, need treated environment to shine
Dynamic microphones: pros and cons
- Pros: Robust, reject background noise, handle loud sources without distortion, work well in untreated rooms
- Cons: Less detailed on quiet sources, slightly rolled-off top end compared to condensers, not ideal for very quiet acoustic instruments
For studio microphone advice tailored to your playing style and room, it is worth consulting with a specialist before purchasing. Getting this right first time saves significant money.
Pro Tip: For small untreated bedrooms, a dynamic microphone like a Shure SM7B or an SM58 will frequently outperform a condenser costing three times as much. Treat the room first, then reassess whether you need to upgrade.
Equipment checklist and workflow for a complete 2026 setup
With everything covered, a structured approach to your final equipment list will ensure nothing is missed. Using a structured checklist for your 2026 home studio workflow covers computer and DAW, audio interface, monitors, headphones, microphones, acoustic treatment, and monitoring calibration tools.
Complete 2026 home studio equipment checklist:
- Computer with sufficient RAM (16GB minimum recommended for modern DAWs)
- Audio interface (two inputs minimum for most guitar and vocal setups)
- Studio monitors (nearfield, 5 to 8 inch woofers for most rooms)
- Closed-back headphones for tracking
- One or two microphones suited to your room treatment level
- Acoustic treatment (bass traps, absorption panels, isolation pads)
- XLR cables, instrument cables, and stands
- DAW software (free options are viable; paid options add workflow features)
- Room correction or calibration software as a final polish step
| Item | Why it matters | Example |
|---|---|---|
| Audio interface | Converts analogue signal to digital cleanly | Focusrite Scarlett 2i2 |
| Studio monitors | Accurate playback for mixing decisions | Yamaha HS5 |
| Closed-back headphones | Tracking without bleed | Shure SRH240A |
| Microphone | Captures instrument or vocal source | Shure SM7B (dynamic) |
| Acoustic treatment | Controls room sound for accurate monitoring | DIY Rockwool panels |
| Room correction software | Compensates for remaining room issues | Sonarworks SoundID |
The final step in any 2026 setup is calibration. Room correction software measures your room’s frequency response and applies corrective EQ to your monitoring chain. It does not replace treatment but does address remaining issues after treatment is in place. For a practical guide on recording your guitar specifically, the DIY guitar recording workflow covers the full process from mic placement to final export.
Our honest take: why most home studio advice gets it backwards
Most home studio guides lead with gear lists. New interface, new microphone, new monitors. The content is sponsored-friendly and it sells products. But it consistently leads musicians to the wrong conclusion: that more expensive kit is the solution to recording problems.
After working with musicians at all levels, from beginners setting up a first bedroom studio to experienced players rebuilding a home setup, the single most consistent pattern is this: the musicians who sound best are not the ones with the most expensive gear. They are the ones who took time to understand their room.
A guitarist recording through a mid-range interface in a thoughtfully treated spare room will produce a cleaner, more professional result than someone recording through a boutique preamp in a bare concrete room. Every time. The room is the instrument, in a sense. You would not play a guitar with uneven frets and a cracked nut and blame your amplifier for the poor tone.
We also see musicians skip the planning phase because it feels less exciting than buying gear. But spending an afternoon measuring and treating your room, hanging a few panels, and positioning your monitors correctly costs far less than a new microphone and produces a far more dramatic improvement. The boring fundamentals always win in audio.
If you are just starting out, keep the gear modest and invest heavily in treatment and monitoring accuracy. Your future self will thank you when mixes translate properly to other playback systems.
Build your home studio with expert guidance from MusicStreet
Whether you are just getting started or refining an existing setup, getting the right instruments and accessories alongside solid advice makes all the difference.

At MusicStreet, we stock guitars, accessories, and studio essentials suited to home recording musicians at every level. Our team in Huntingdon, Cambridgeshire, combines hands-on product knowledge with genuine passion for helping musicians get the best from their setup. From selecting the right acoustic guitar for home recording to sourcing the accessories that complete your signal chain, we offer personalised guidance, professional instrument inspection, and post-sale support that larger retailers simply cannot match. Browse our range online or visit us in store to speak with someone who actually plays.
Frequently asked questions
What is the minimum budget for a viable home studio?
A basic home studio can work from around £500 to £800 by prioritising acoustics, an entry-level audio interface, headphones, one microphone, and free DAW options like GarageBand or Reaper.
Is it better to treat my room or buy more expensive monitors?
Treating your room first delivers a bigger improvement for most home studios, since even quality monitors will sound inaccurate without proper acoustic treatment in place.
Can I mix music using only headphones?
Mixing only on headphones can hide low-end balance issues that become obvious on speakers; use both monitors and headphones for the most reliable results.
How do I position speakers in a small room?
Keep monitors at ear height, angle them toward your listening position, and form an equilateral triangle between the two speakers and your ears, avoiding wall corners entirely.
What type of microphone is best for an untreated bedroom studio?
Dynamic microphones are usually best because they are less sensitive to reflections and background noise, making them far more forgiving in untreated or lively acoustic spaces.

Share:
Fender Telecaster Guide
Best Practice Amps for Guitar: Home & Studio Use