

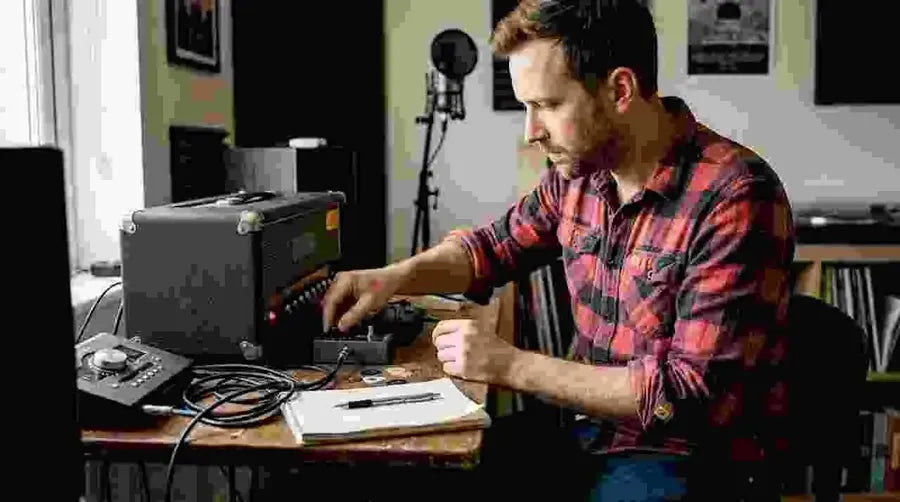
- Noise gates automatically reduce background noise by attenuating signals below a set threshold.
- They are versatile tools used for cleaning vocals, isolating drum hits, and reducing guitar hum.
- Proper setup with careful threshold, attack, release, and hold controls is essential to avoid unnatural sound artifacts.
If you’ve ever recorded a guitar part only to replay it and wince at the hiss, hum, or room noise bleeding through, you’ll understand the frustration of unwanted audio. Many musicians assume noise gates are reserved for high-end studios or seasoned engineers with racks full of outboard gear. That assumption couldn’t be more wrong. Whether you’re a bedroom guitarist recording your first demo or a live sound engineer running monitors for a touring band, a noise gate can transform your recordings from muddy and distracting to focused and professional. This guide covers exactly what noise gates do, how to set them up, and how to avoid the pitfalls that trip up even experienced players.
Table of Contents
- What is a noise gate and how does it work?
- Common uses of noise gates for musicians and engineers
- How to set up a noise gate: essential controls explained
- Noise gates versus expanders and other noise reduction options
- Troubleshooting: avoiding common noise gate mistakes
- An expert take: why subtlety and context matter most with noise gates
- Take your sound further with the right gear
- Frequently asked questions
Key Takeaways
| Point | Details |
|---|---|
| Noise gates explained | A noise gate lets wanted sound through while reducing unwanted noise below a threshold. |
| Practical musician uses | You can clean up vocals, tighten drums, and cut guitar hum using noise gates. |
| Essential settings matter | Correct threshold, attack, and release settings are key to natural gating. |
| Avoid common mistakes | Improper use can cause choppy audio or artefacts—subtle adjustments are vital. |
| Expansion alternatives | Expanders or sidechain techniques offer gentler noise reduction. |
What is a noise gate and how does it work?
A noise gate is, at its core, a gatekeeper for your audio signal. As LALAL.AI explains, “a noise gate is an audio processor that attenuates or mutes signals below a set threshold, letting desired sounds pass while suppressing background noise.” Think of it like a bouncer at a venue door: sounds above the threshold get in, sounds below it stay out.
The name ‘gate’ comes from this binary behaviour. When the gate is open, audio flows through uninterrupted. When it’s closed, the signal is silenced or heavily reduced. The point at which it opens or closes is determined by the threshold, which you set manually based on how loud your unwanted noise is relative to your intended signal.
In practice, this means your guitar’s 60-cycle hum disappears the moment you stop playing. The microphone picking up your drummer’s hi-hats bleeding into the snare channel goes quiet between hits. Vocal tracks no longer carry the hiss of an air conditioning unit between phrases. All of this happens automatically, in real time, without any manual editing.
Noise gates can improve signal-to-noise ratio by up to 18dB in practical applications, which is a meaningful improvement when you consider that every 6dB roughly doubles the perceived loudness difference. That’s the kind of clarity that separates a demo that sounds home-made from one that sounds intentional.
Here’s a quick look at how threshold settings affect gate behaviour:
| Threshold setting | Signal type | Gate effect |
|---|---|---|
| Too low | Noise passes through | Gate stays open; ineffective |
| Correctly set | Noise muted, signal passes | Optimal gating |
| Too high | Desired signal cut | Over-gating; sounds choppy |
| Mid-range (variable) | Partial signal passing | Expansion effect |
“A noise gate works by monitoring the incoming signal level and comparing it against the set threshold. Only signals that exceed the threshold are allowed to pass through.” This core function makes it an indispensable tool in any signal chain.
If you’re building a pedalboard and wondering where a gate fits alongside your other effects, the guitar pedal guide from MusicStreet is a solid place to start understanding your full signal chain.
Common uses of noise gates for musicians and engineers
Noise gates show up in almost every corner of music production, and their applications go well beyond simply silencing hum. As Nail The Mix notes, “noise gates are used to clean up vocals, isolate drum hits, cut guitar amp hum, and create effects like gated reverb.”
Vocals: In a home recording environment, your microphone captures more than just your voice. Room reflections, computer fan noise, and even the sound of your chair creaking all make it onto the track. A noise gate with a carefully set threshold eliminates these between phrases, keeping the focus entirely on your performance.
Drums: Drum kits are notoriously difficult to mic cleanly. Each microphone picks up not just its intended drum but everything around it. Gating the snare channel, for example, allows only the sharp crack of the snare hit to pass while the rest of the kit bleeds in. This tightens the low end and adds punch without requiring heavy-handed compression.
Guitar: High-gain amp setups are particularly prone to hum, buzz, and radio interference. A noise gate placed correctly in your chain cuts all of that noise when you’re not playing, giving your riffs a sharper, more defined edge. If you’re setting up at home, the guide on recording guitar at home walks through how to get a clean signal from the start.
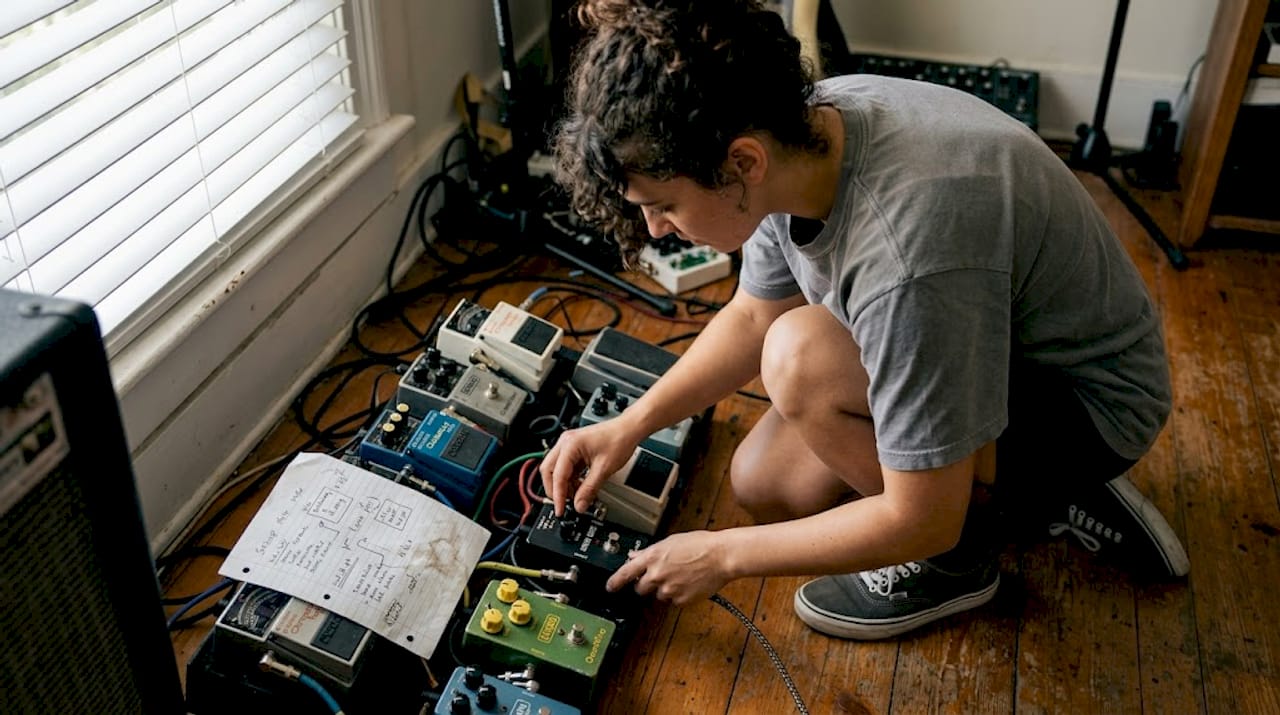
Creative uses: Gated reverb, made famous in the 1980s on snare drums, is an effect where a large reverb tail is abruptly cut off by a gate. The result is a punchy, stylised sound that remains hugely popular in pop, rock, and electronic music.
Key use cases at a glance:
- Reducing room noise and breath sounds on vocal tracks
- Isolating individual drum hits and reducing mic bleed
- Cutting amp hum and buzz in high-gain guitar rigs
- Creating gated reverb for stylised drum sounds
- Cleaning up live stage performances between songs
Pro Tip: Place your noise gate before your gain-heavy pedals in the signal chain. This way, it only lets a clean signal through to your drive or distortion pedals, rather than gating the already-processed sound after the fact. For more on pedal placement, the guitar pedal tips article covers this in useful detail.
How to set up a noise gate: essential controls explained
A noise gate has four primary controls, and understanding each one is essential before you start turning knobs. Benchmark settings suggest a threshold 6-10dB above the noise floor, an attack of 0-1ms for drums and guitars, 15-20ms for vocals, a release of 50-500ms, and a hold of 80-200ms.
Threshold: The level below which the gate closes. Set this just above your noise floor.
Attack: How quickly the gate opens when the signal exceeds the threshold. Fast attack settings (0-1ms) suit transient-rich instruments like drums. Slower attacks (15-20ms) work better for vocals to avoid cutting off the natural start of a word.
Release: How quickly the gate closes after the signal drops below the threshold. Too fast, and the sound cuts off unnaturally. Too slow, and noise bleeds back in.
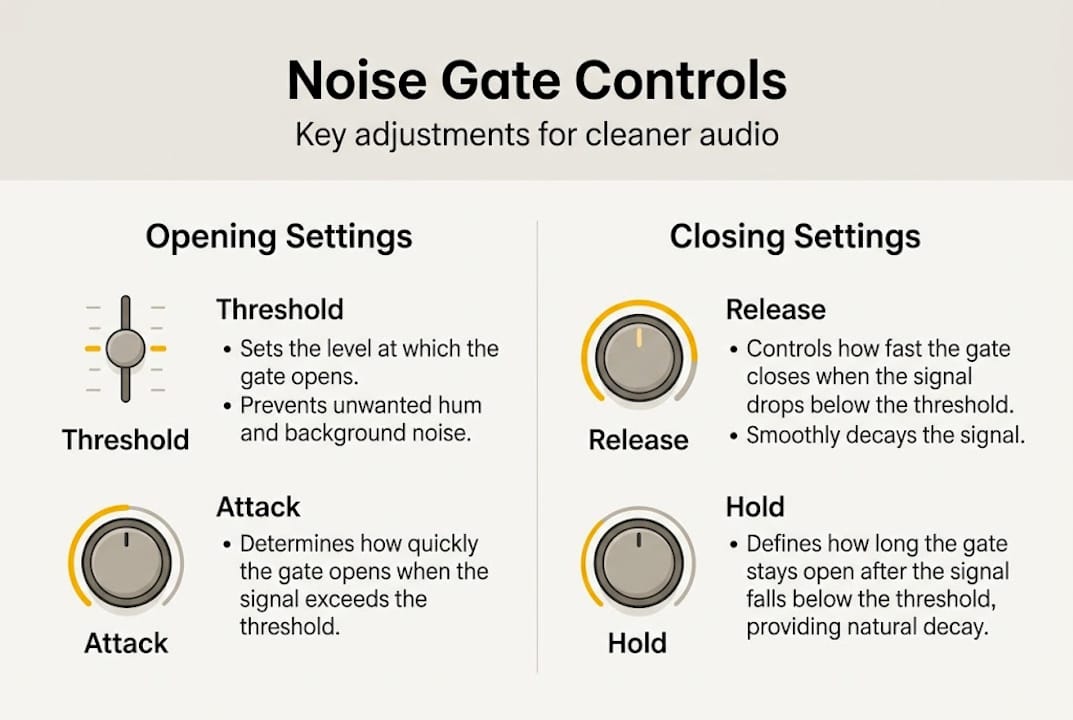
Hold: The time the gate stays open after the signal drops below the threshold. This prevents the gate from flickering open and closed rapidly during sustained notes.
Here’s how typical settings vary by instrument:
| Instrument | Threshold | Attack | Release | Hold |
|---|---|---|---|---|
| Kick drum | -20 to -30dB | 0-1ms | 50-100ms | 80-120ms |
| Snare | -15 to -25dB | 0-1ms | 80-150ms | 100-200ms |
| Guitar | -30 to -40dB | 1-5ms | 200-500ms | 100-150ms |
| Vocals | -35 to -45dB | 15-20ms | 300-500ms | 150-200ms |
Steps to dial in your gate:
- Find your noise floor by recording silence and noting the average level.
- Set the threshold 6-10dB above that level.
- Start with a fast attack and adjust upward until the gate opens naturally.
- Set a moderate release (around 200ms) and shorten or lengthen it to taste.
- Use hold to smooth out any flickering on sustained notes.
- A/B test with and without the gate to check for unwanted artefacts.
Pro Tip: Always set your threshold just above the noise floor, not well above it. If you push the threshold too high, you risk cutting the natural decay of your instrument, which sounds far worse than a little background noise.
If you’re still assembling your recording setup, the guide on recording equipment essentials outlines everything you need before plugging in.
Noise gates versus expanders and other noise reduction options
Not every noise problem calls for a gate. Understanding your alternatives helps you choose the right tool rather than forcing every problem to fit the same solution.
As iZotope explains, “a noise gate is an extreme downward expander; expanders offer gentler reduction. Gates fully mute below threshold; expanders attenuate proportionally.” In other words, a gate is binary (open or closed), while an expander applies graduated reduction that can sound more natural on certain sources.
“For sources with complex, evolving sounds such as room ambience or vocal reverb tails, an expander often preserves musicality better than a hard gate, which can sound abrupt and mechanical.”
Comparison of noise reduction tools:
| Tool | Method | Best for | Limitation |
|---|---|---|---|
| Noise gate | Hard mute below threshold | Sharp transients, tight gating | Can sound choppy on sustain |
| Expander | Gradual reduction below threshold | Vocals, room ambience | Less aggressive on loud noise |
| NR plugin | AI/spectral analysis | Constant noise (hiss, hum) | Can introduce artefacts |
| Sidechain EQ | Frequency-selective gating | Specific frequency noise | Requires more setup |
Choosing the right tool:
- Use a noise gate for drums, high-gain guitar, and any source with clear transients
- Use an expander for vocals, acoustic instruments, and situations where abrupt muting sounds wrong
- Use an NR plugin for continuous background noise like room tone or tape hiss
- Use sidechain EQ when the noise sits in a specific frequency range
The audio dynamics deep dive from iZotope is an excellent resource if you want to go further into dynamics processing. For those thinking about how their amp or digital setup affects noise in the first place, the piece on tube amps vs digital is worth reading alongside this guide.
Troubleshooting: avoiding common noise gate mistakes
Even with a solid understanding of the controls, noise gates can introduce problems if you’re not careful. Knowing what to listen for saves you hours of frustration.
As iZotope points out, “over-gating causes choppy audio, fast release can sound unnatural, too-slow attack misses transients; consider expansion or sidechain EQ for subtlety.”
Common mistakes to watch for:
- Over-gating: Setting the threshold too high cuts into your signal, creating a choppy, stuttering sound. Lower the threshold slightly and listen again.
- Release too fast: The gate snaps shut before your note finishes decaying. This is particularly noticeable on guitar sustain or vocal phrases. Lengthen the release time.
- Attack too slow: You miss the initial transient of a drum hit or guitar pick attack, leaving the sound feeling dull and undefined. Shorten the attack.
- Gate flickering: The gate rapidly opens and closes on sustained notes, creating a tremolo-like artefact. Use the hold control to stabilise it.
- Treating gates as a fix for bad gain staging: If your signal-to-noise ratio is very poor to begin with, a gate can’t rescue it. Sort your gain structure first.
Pro Tip: Always A/B test your gated and ungated signal before committing to settings. What sounds fine soloed can feel lifeless in a full mix. Toggle the gate on and off repeatedly while the full track plays to judge naturalness in context.
For players using effects pedals, knowing which effects introduce noise in the first place is half the battle. The article on essential effects pedals covers which types of pedals tend to add the most noise and how to manage them.
An expert take: why subtlety and context matter most with noise gates
There’s a temptation, especially for those new to gating, to treat silence as the goal. If there’s any noise between notes, the instinct is to gate harder and push the threshold higher until nothing gets through. In reality, this approach almost always damages the recording more than the original noise ever would.
The best engineers treat a noise gate as a scalpel, not a hammer. Musicality lives in the spaces between notes as much as in the notes themselves. The natural decay of a guitar chord, the breath before a vocal phrase, the room sound that gives a drum kit its character: all of these can be erased by aggressive gating, leaving behind something technically clean but emotionally flat.
The emerging wave of AI-assisted gating tools is genuinely impressive. As MP3-AI’s noise reduction shootout highlights, AI gates adapt dynamically rather than responding to fixed thresholds, but they can introduce their own artefacts under challenging conditions. The best results still come from a trained ear making context-sensitive decisions.
Our honest advice: learn the traditional controls first. Context decides settings, not fixed recipes. A gate that works beautifully on a tight, punchy rock snare will sound catastrophic on a delicate acoustic guitar. Trust your ears over the numbers.
Take your sound further with the right gear
Understanding noise gates is only part of the equation. The other part is making sure your instruments and equipment give your gate something genuinely worth preserving. A great guitar through a quality amp, with a well-considered pedalboard, will always respond better to thoughtful gating than a noisy rig trying to be fixed after the fact.

At MusicStreet, we stock a carefully selected range of guitars and accessories chosen by musicians, for musicians. Whether you’re after a new electric to cut through the mix or specialist advice on building your signal chain, our team at the Huntingdon store is here to help. Browse our full range of premium guitar gear online or visit us in person to try before you buy. Free UK delivery is available on qualifying orders, and every instrument comes with our expert inspection and setup.
Frequently asked questions
What is the difference between a noise gate and a compressor?
A noise gate mutes or reduces sounds below a set threshold, while a compressor controls loud sounds by reducing volume above a set level. They work in opposite directions: gates handle silence and noise, compressors handle peaks and dynamics. As iZotope clarifies, gates are an extreme form of downward expansion, which is quite different from compression.
Where should I put a noise gate in my effects chain?
Place a noise gate after high-gain pedals but before time-based effects like reverb or delay. This way, the gate cleans up the distorted signal before it feeds into effects that would otherwise extend and amplify the noise. Nail The Mix highlights that correct placement is essential for clean, natural-sounding results.
How do I know what threshold to set for a noise gate?
Set your threshold about 6-10dB above the noise floor to suppress unwanted sounds without cutting your main tone. For example, if your noise floor sits at -40dB, set your threshold around -34dB to -30dB. This threshold recommendation gives you enough headroom to gate cleanly without biting into your signal.
What are the risks of overusing a noise gate?
Over-gating can cause choppy, unnatural audio and may cut off the natural decay of your instrument or voice. Aggressive gating often sounds worse than leaving a small amount of background noise in place.
Can noise gates remove all background noise?
Noise gates are very effective for constant low-level noise but are less suited to removing sudden, loud, or non-constant background sounds. As LALAL.AI notes, a gate mutes signals below a set threshold, which means unpredictable or loud noise that sits above your signal level will still pass through.







Share:
Parallel wiring for guitars: brighter tone explained
Piezo pickups explained: enhance your guitar's acoustic sound